Last week Chloe Condon, a Cloud Developer Advocate for Microsoft, posted a great article and accompanying open source project for helping people handle awkward social situations. The project – combining Azure Functions, Twilio and a Flic button (available from Shortcut Labs), allows a user to trigger a fake call using a discrete Bluetooth button, which triggers an Azure function, which in turn uses the Twilio API to make a call to a specified number and play a pre-recorded MP3. You can read much more detail about the project in the great article Chloe wrote about it over on Medium.
As a side note, Chloe describes herself as an ambivert, a term which I will admit I had never come across, but after reading the description fits me to a tee. As with Chloe, people assume I am an extrovert, but whilst I am totally comfortable presenting to a room of conference goers and interacting with folks before and after, I soon find myself needing to recharge my batteries and thinking of any excuse to extricate myself from the situation – even just for a short time. Hence, this project resonated with me (as well half of Twitter it seems!).
One of the things that struck me when first looking at the app was the fact that a pre-recorded MP3 was needed. Now, this obviously means that you can have some great fun with this, potentially playing your favorite artist down the phone, but wouldn’t it be good if you could generate natural sounding speech dynamically at the point at which you made the call? Step in the Speech service from the Microsoft Cognitive Services suite – this is what I am going to show you how to do as part of this post.
The Speech service has, over the last year or so, gone through some dramatic improvements, with one of the most incredible, from my perspective, being neural voices. This is ability to have speech generated that is almost indistinguishable from a real human voice. You can read the blog post where neural voices were announced here.
So, based on all of this, what I wanted to achieve was the ability to trigger an Azure function – passing the text to be turned into speech – and have that generate an MP3 file for me and have that available to use immediately.
This is what I am going to show you how to do in this article and below you can hear an example of speech generated using the new neural capabilities of the service.
Let’s get started….
Creating our speech resource
The first thing we need to do is to create a new Speech service resource in Azure. This will give us the text-to-speech endpoint that we will use later on in our function.
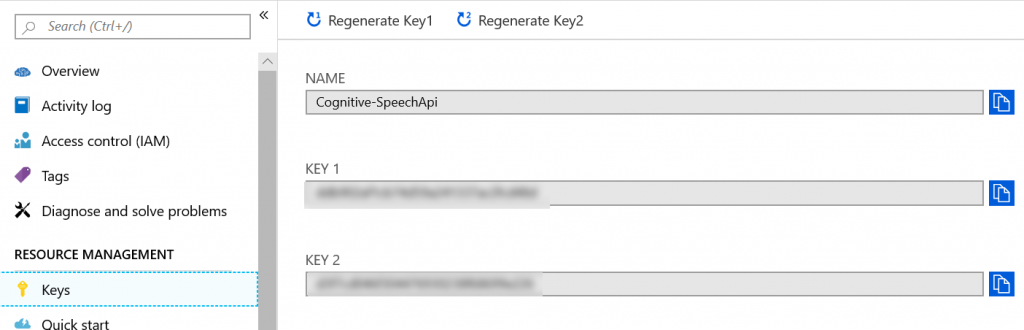
Once you have created your new Speech resource, go to the Keys section and make a note of one of the two subscription keys that have been generated for you and also the name you gave to your new Speech resource when you created it – you will need these later on.
Create an Azure Function
If you are not familiar with Azure functions, I will walk you through creating one here, but you can read more detail about them over at the Microsoft docs site.
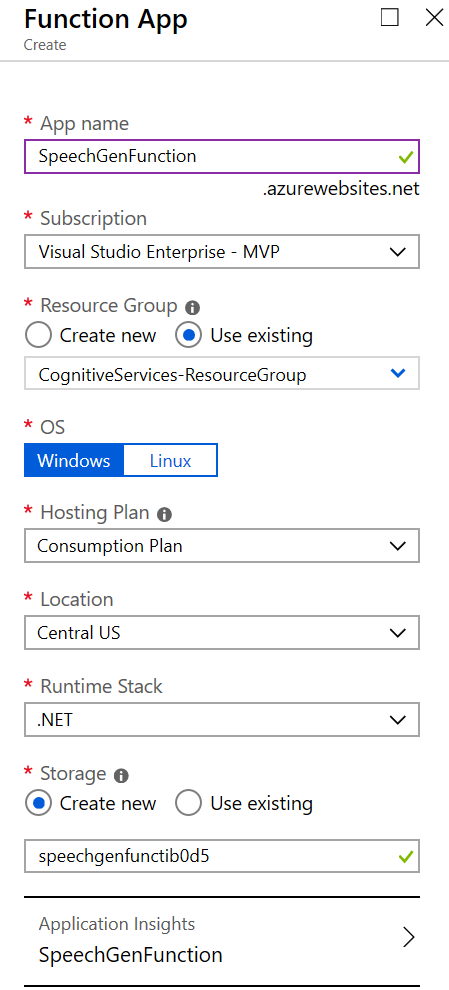
In the Azure portal create a new Function App. As well as the usual details you need to provide, such as name. resource group etc, you need to select the runtime for your function – for this example I am choosing .NET as I am creating a C# based function.
Once your Function App has been created, you are ready to start to create and configure your function for generating speech. Navigate to the newly created Function App in the portal and create a new function. Here you will be presented with a few options for your development environment, including Visual Studio, VS Code or developing a function within the portal using the built-in editor – in my case I chose to use the in-built editor within the portal, but feel free to pick the one that suits you best. Choosing one of the option options will provide you with instructions for getting your environment up and running.
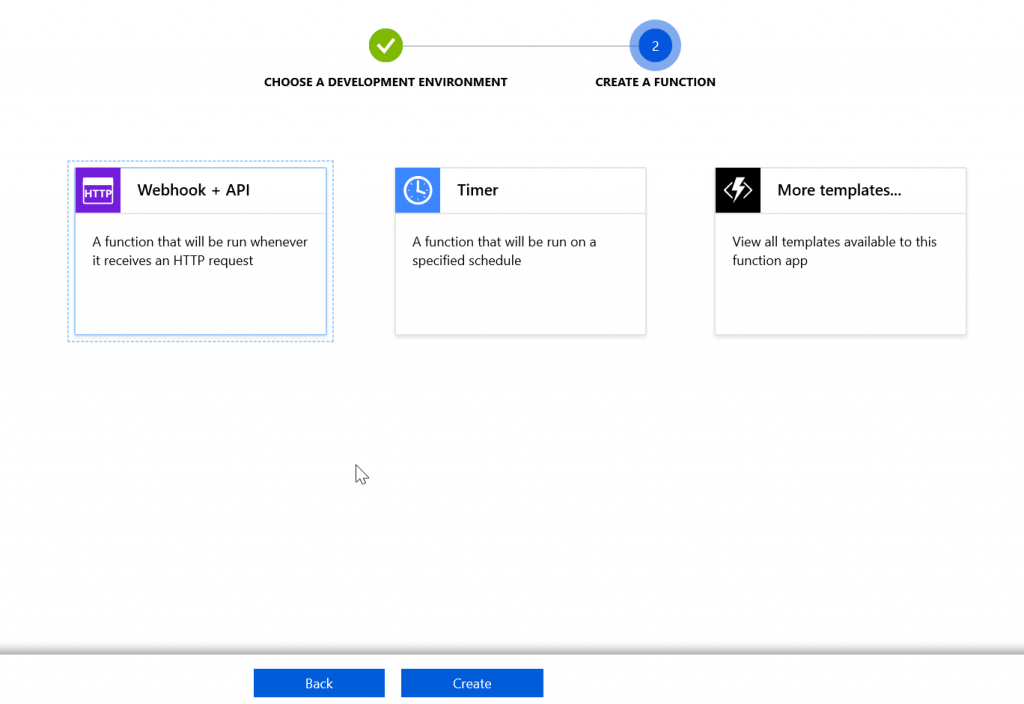
Next, we need to choose the type of function we wish to create, namely how the function will be triggered. Functions can be configured to be triggered in a number of ways, including a HTTP request (visiting a URL firing an event to a webhook) or on a scheduled basis with a timer. For this function choose ‘Webhook + API’ for a HTTP trigger – this means we will be able to trigger speech generation on demand.
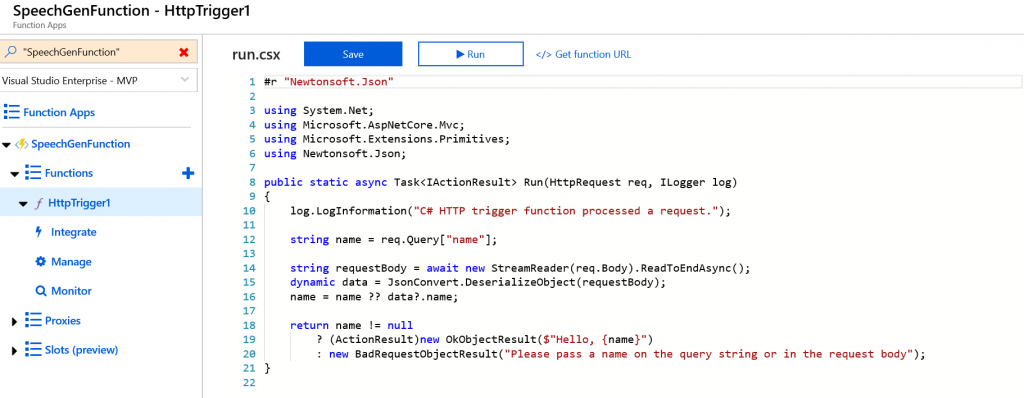
You should now have a blank function, which looks something like the one shown below.
Configuring our output binding for storing our generated MP3
When we generate our speech, we are going to need somewhere to store the output so that we can consume it elsewhere (for example, from Chloe’s app). This is where the input / output binding integration for Azure Functions can help. Bindings allow us to declaratively connect a function to another resource, providing easier access and integration from within our functions code. For example, you could create an input binding to Azure Table storage, providing you with access to that table when your function is triggered. You can read more about triggers and bindings over at
https://docs.microsoft.com/en-us/azure/azure-functions/functions-triggers-bindings
For our purposes here though, we want to create an output binding to Azure Blob storage, allowing us to write our generated audio file to blob storage easily. To do this, navigate to the Integrate tab underneath your function in the portal and create a new output binding, selecting Blob storage. We then define a few settings;
• Blob parameter name – the name of the parameter that will be passed to and available within our function.
• Path – the path where the new file will be saved. I have chosen to specify ‘outputContainer/GeneratedSpeech.mp3’, which means I will replace the same file each time. However, you could use ‘outcontainer/{rand-guid}.mp3’ to generate a new file each time.
• Storage Account Connection – you shouldn’t need to change this as it will be automatically connected to the storage account you specified / created when you created your Function App.
Building out our function to generate speech
Ok, so now we have our Speech resource and our Azure function, which is ready to be triggered on demand (via a HTTP request) and to store output into Blob storage. Time to bring it all together.
The first thing we need to do is alter the signature for our function to accept our output binding for Azure blob storage that we created earlier and to create a few properties that we will need. In the code snippet below you will see I have added a parameter ‘CloudBlockBlob outputBlob’ for our storage binding and then created several properties related to the Speech resource we created earlier.
Here is where you will need to use your subscription key / resource name you noted down earlier when we created the speech resource. Depending on the location of your speech resource, you may also need to change the endpoints below to reflect the right location (I created my resource in East US). You will also see this is where I am specifying the voice I would like to use when generating the speech – different voices are supported in different locations, so be sure to check out https://docs.microsoft.com/en-gb/azure/cognitive-services/speech-service/language-support#text-to-speech to see what voices are supported in each region. This especially applies to the new neural voices (the ones that sound almost indistinguishable from a human), which are only available in certain regions at the moment.
|
1 2 3 4 5 6 7 8 9 10 11 12 13 14 15 16 17 18 19 |
public static async Task<IActionResult> Run(HttpRequest req, CloudBlockBlob outputBlob, ILogger log) { // Access key for the Speech resource created within Azure string subscriptionKey = "<YOUR SPEECH SUBSCRIPTION KEY>"; // Text to speech endpoint for your speech resource - be sure to check that the // voice you specify below is supported within your region string ttsEndpoint = "https://eastus.tts.speech.microsoft.com/cognitiveservices/v1"; // Endpoint to fetch an access token for your text to speech request // Be sure that the region matches the region of your text to speech endpoint string accessTokenEndpoint = "https://eastus.api.cognitive.microsoft.com/sts/v1.0/issueToken"; // The name of your speech resource in Azure string azureSpeechResourceName = "<YOUR SPEECH RESOURCE NAME>"; // The voice to use - make sure to use a voice that is available in your region // You can see available voices at // https://docs.microsoft.com/en-gb/azure/cognitive-services/speech-service/language-support#text-to-speech string voice = "Microsoft Server Speech Text to Speech Voice (en-US, Guy24KRUS)"; // The above line specifies US male neural voice. Comment it out and uncomment // the line below to use the UK female neural voice //string voice = "Microsoft Server Speech Text to Speech Voice (en-US, JessaNeural)"; |
We now need to create a method to fetch us an access token for accessing our speech resource – you need a new access token each time you call the service.
|
1 2 3 4 5 6 7 8 9 10 11 12 13 14 |
public static async Task<string> FetchTokenAsync(string tokenFetchUri, string subscriptionKey) { using (var client = new HttpClient()) { Console.WriteLine(subscriptionKey); Console.WriteLine(tokenFetchUri); client.DefaultRequestHeaders.Add("Ocp-Apim-Subscription-Key", subscriptionKey); UriBuilder uriBuilder = new UriBuilder(tokenFetchUri); var result = await client.PostAsync(uriBuilder.Uri.AbsoluteUri, null).ConfigureAwait(false); return await result.Content.ReadAsStringAsync().ConfigureAwait(false); } } |
Finally, we update the main body of our function to pull this all together an generate our speech audio file on-the-fly, accepting the text we want to convert to speech as a querystring parameter when we call our function. In the snippet below, we do the following;
- Grab the text we want to convert from the query string
- Generate our access token using the helper method shown above
- Use HttpClient to generate a HTTP request to the Speech service endpoint, passing in the text we want to convert to speech and the voice that should be used.
- Finally we use the UploadFromStreamAsync method on our outputBlob to save our audio to blob storage and send the URL to the file as a response to the function call.
|
1 2 3 4 5 6 7 8 9 10 11 12 13 14 15 16 17 18 19 20 21 22 23 24 25 26 27 28 29 30 31 32 33 34 35 36 37 38 39 40 41 42 43 44 45 |
if(!string.IsNullOrEmpty(req.Query["text"])) { text = req.Query["text"]; } else { return new BadRequestObjectResult("Please pass text you wish to generate on the query string or in the request body using param: text"); } try { accessToken = await FetchTokenAsync(accessTokenEndpoint, subscriptionKey).ConfigureAwait(false); } catch (Exception ex) { return new BadRequestObjectResult("Failed to obtain access token."); } string body = @"<speak version='1.0' xmlns='https://www.w3.org/2001/10/synthesis' xml:lang='en-US'> <voice name='" + voice + "'>" + text + "</voice></speak>"; using (var client = new HttpClient()) { using (var request = new HttpRequestMessage()) { request.Method = HttpMethod.Post; request.RequestUri = new Uri(ttsEndpoint); request.Content = new StringContent(body, Encoding.UTF8, "application/ssml+xml"); request.Headers.Add("Authorization", "Bearer " + accessToken); request.Headers.Add("Connection", "Keep-Alive"); request.Headers.Add("User-Agent", azureSpeechResourceName); request.Headers.Add("X-Microsoft-OutputFormat", "riff-24khz-16bit-mono-pcm"); using (var response = await client.SendAsync(request).ConfigureAwait(false)) { response.EnsureSuccessStatusCode(); using (var dataStream = await response.Content.ReadAsStreamAsync().ConfigureAwait(false)) { await outputBlob.UploadFromStreamAsync(dataStream); return new OkObjectResult(outputBlob.Uri.AbsoluteUri); } } } } |
The completed function
Once you have finished, the completed function should look like below;
|
1 2 3 4 5 6 7 8 9 10 11 12 13 14 15 16 17 18 19 20 21 22 23 24 25 26 27 28 29 30 31 32 33 34 35 36 37 38 39 40 41 42 43 44 45 46 47 48 49 50 51 52 53 54 55 56 57 58 59 60 61 62 63 64 65 66 67 68 69 70 71 72 73 74 75 76 77 78 79 80 81 82 83 84 85 86 87 |
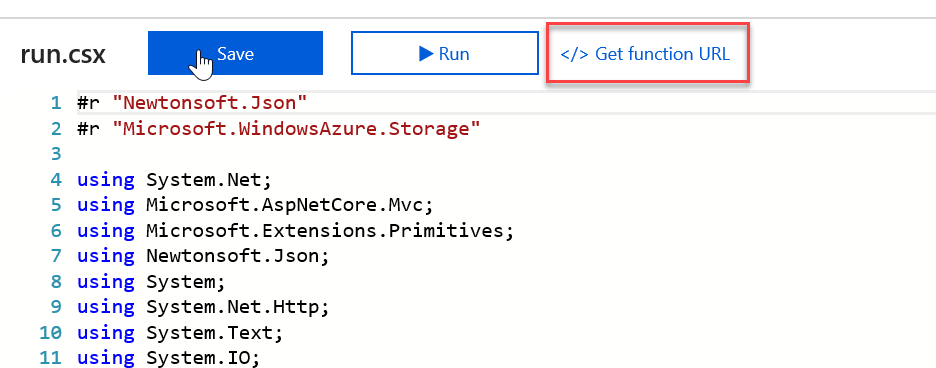
#r "Newtonsoft.Json" #r "Microsoft.WindowsAzure.Storage" using System.Net; using Microsoft.AspNetCore.Mvc; using Microsoft.Extensions.Primitives; using Newtonsoft.Json; using System; using System.Net.Http; using System.Text; using System.IO; using System.Threading.Tasks; using Microsoft.WindowsAzure.Storage.Blob; public static async Task<IActionResult> Run(HttpRequest req, CloudBlockBlob outputBlob, ILogger log) { string subscriptionKey = "<YOUR SPEECH SUBSCRIPTION KEY>"; string ttsEndpoint = "https://eastus.tts.speech.microsoft.com/cognitiveservices/v1"; string accessTokenEndpoint = "https://eastus.api.cognitive.microsoft.com/sts/v1.0/issueToken"; string azureSpeechResourceName = "<YOUR SPEECH RESOURCE NAME>"; string voice = "Microsoft Server Speech Text to Speech Voice (en-US, Guy24KRUS)"; string accessToken = null; string text = null; if(!string.IsNullOrEmpty(req.Query["text"])) { text = req.Query["text"]; } else { return new BadRequestObjectResult("Please pass text you wish to generate on the query string or in the request body using param: text"); } try { accessToken = await FetchTokenAsync(accessTokenEndpoint, subscriptionKey).ConfigureAwait(false); } catch (Exception ex) { return new BadRequestObjectResult("Failed to obtain access token."); } string body = @"<speak version='1.0' xmlns='https://www.w3.org/2001/10/synthesis' xml:lang='en-US'> <voice name='" + voice + "'>" + text + "</voice></speak>"; using (var client = new HttpClient()) { using (var request = new HttpRequestMessage()) { request.Method = HttpMethod.Post; request.RequestUri = new Uri(ttsEndpoint); request.Content = new StringContent(body, Encoding.UTF8, "application/ssml+xml"); request.Headers.Add("Authorization", "Bearer " + accessToken); request.Headers.Add("Connection", "Keep-Alive"); request.Headers.Add("User-Agent", azureSpeechResourceName); request.Headers.Add("X-Microsoft-OutputFormat", "riff-24khz-16bit-mono-pcm"); using (var response = await client.SendAsync(request).ConfigureAwait(false)) { response.EnsureSuccessStatusCode(); using (var dataStream = await response.Content.ReadAsStreamAsync().ConfigureAwait(false)) { await outputBlob.UploadFromStreamAsync(dataStream); return new OkObjectResult(outputBlob.Uri.AbsoluteUri); } } } } } public static async Task<string> FetchTokenAsync(string tokenFetchUri, string subscriptionKey) { using (var client = new HttpClient()) { Console.WriteLine(subscriptionKey); Console.WriteLine(tokenFetchUri); client.DefaultRequestHeaders.Add("Ocp-Apim-Subscription-Key", subscriptionKey); UriBuilder uriBuilder = new UriBuilder(tokenFetchUri); var result = await client.PostAsync(uriBuilder.Uri.AbsoluteUri, null).ConfigureAwait(false); return await result.Content.ReadAsStringAsync().ConfigureAwait(false); } } |
Calling your new function
Now that you have finished writing your function, you can call it from your browser, passing in the text to be generated into speech on the query string. You can grab the URL for your function at the top of the editor.
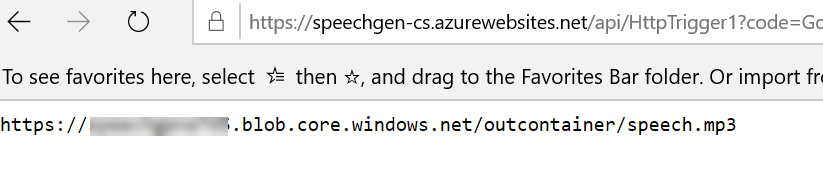
Once you have your URL, just append a new query string parameter and specify the text you want to generate. Calling this URL should then return you the URL of your generated MP3 file is all goes well. Below is an example of the URL and what you should see in your browser;
https://<YOUR FUNCTION URL>text=This is some generated speech, as an example to go with this post, demonstrating what a realistic voice sounds like. Pretty cool huh?
Summary
In this post I have shown you how to create an Azure function to call the Speech Cognitive Service to generate text to speech on demand and save the output to blob storage. You can now use the output of for whatever you want, including with Chloe Condon’s awesome app.
Hopefully you will find this useful – let me know how you get on in the comments and reach out to me on Twitter if you have any problems and I will be happy to try and help you figure them out!