LUIS, the Language Understanding Intelligence Service, is a part of Microsoft’s Cognitive Services suite. If you are reading this and you don’t yet have a clear understanding of what Cognitive Services are, head over and read my introduction to Cognitive Services before you continue.
During this post I will introduce you to what the LUIS service is and show you how to build a model to aid in natural language understanding in your applications.
Update: I have now published a quick video overview of LUIS including how to create your first model.
Meet LUIS
Understanding users and what they want to achieve has always been difficult and this only gets more complicated when we move to the type of interaction methods we see with things like the Bot Framework, where users are communicating using plain English (or their native language). Whilst it might be simple for you as a human to understand what someone means when they say “I would like to book a holiday” in the context of their job, without help a computer is going to have no idea. We could hard code a string and watch for a user saying exactly “I would like to book a holiday”, but what if they say “I need to take some annual leave” instead?
This is the ultimate mission of the LUIS service – to allow you to add natural language understanding to applications.
Drawing on cutting edge machine learning from Microsoft Research, LUIS has many out of the box, pre-built, models from Bing and Cortana which you can use if they suit your needs, but you can also create your own specialised models built around your own domain, entities and requirements.
Building a model
Lets take the example above of a user who is asking to book a holiday, regardless of the type of input (bot, email, mobile app, web site etc.) and build a model in LUIS to understand the user.
Creating your new LUIS application
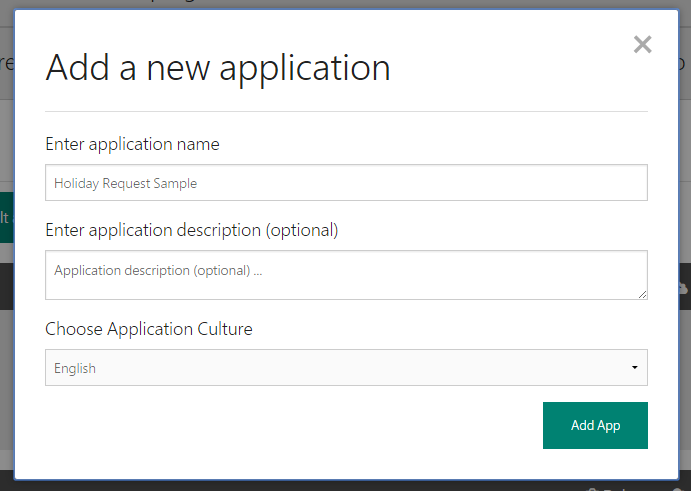
First, head over to http://luis.ai and sign in with a Microsoft account, then go to the My Applications page and choose New App -> New Application and you should be presented with a dialog like the one shown below. Give your model a name and then click Add App.
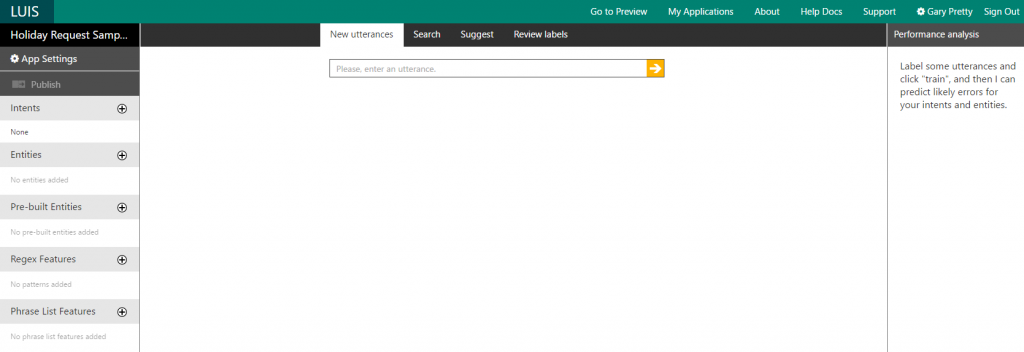
Your new LUIS application will now be created, which shouldn’t take more than 30 seconds to a minute and once it has been created you should see the dashboard below.
Defining your intents
At the core of your LUIS model are your Intents, which you define and are specific to your application. You can think of Intents as the end goal that someone communicating with your model would like to reach. In our example that could be ‘Book Holiday’ and if we were to expand the functionality of our model to support more tasks, we might also have Intents such as ‘Cancel Holiday’ or ‘Get Holiday Days Remaining’. Along with Intents are items called Utterances. Utterances are phrases which a user might use in order to reach a specific Intent. For example, for our ‘Book Holiday’ Intent, an Utterance might be “I want to book a holiday”.
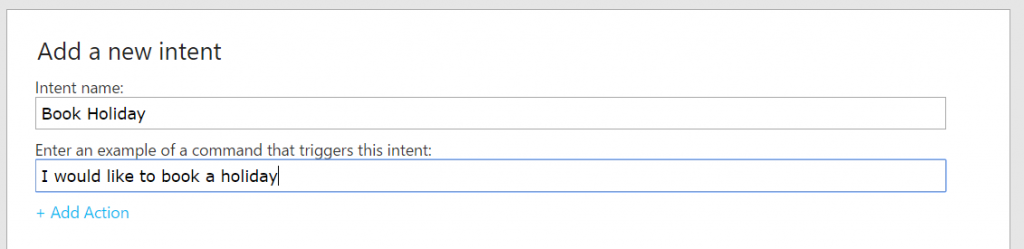
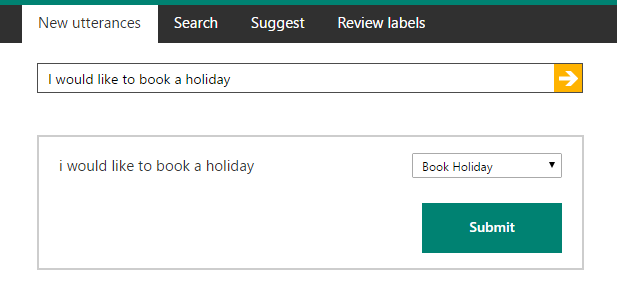
So, let’s create a ‘Book Holiday’ intent. Click the plus icon next to the Intents section and, in the dialog that appears, fill in the name of the Intent and an example Utterance for it.
You should then see Utterance you entered in the New Utterances tab and your new Intent that it targets in the drop down list. Click Submit to confirm that this is correct.
Adding Entities
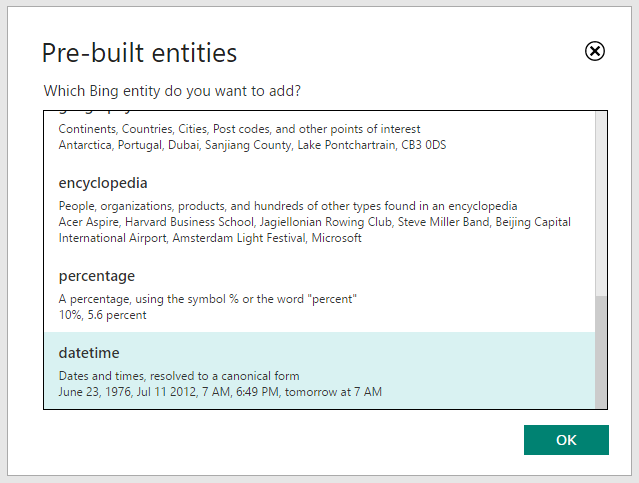
Entities are items that you want LUIS to be able to identify and pull out of user input. These Entities can either be one of several pre-built Entities that LUIS offers us, including date/time, percentages, geographical places, amongst others. For our scenario it would be really useful for us to be able to identify date/times, so that if a user specifies the dates they would like they holiday to start /finish on, they are extracted for us. To do this we simply click to add a new pre-built Entity on the left hand side of the dashboard and select datetime from the list.
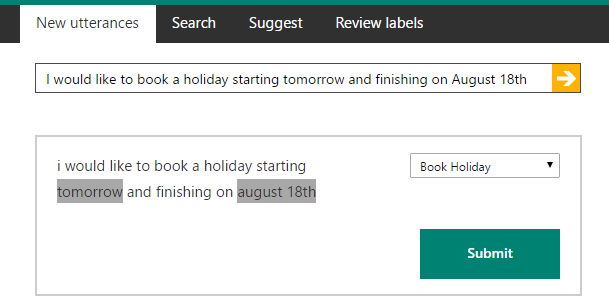
Now that we have added the datetime Entity, if we add a new Utterance like, “I would like to book a holiday starting tomorrow and finishing on August 18th”, LUIS should highlight the “tomorrow” and “August 18th” parts of the phrase as it has detected that they are date/time objects. Notice that LUIS is clever enough to not just highlight straightforward dates, but also things like “tomorrow” and “at the moment”. Go ahead and give it a try, add a new Utterance and you should see something like what is shown below and, providing it worked as expected, just click Submit to add this to your model.
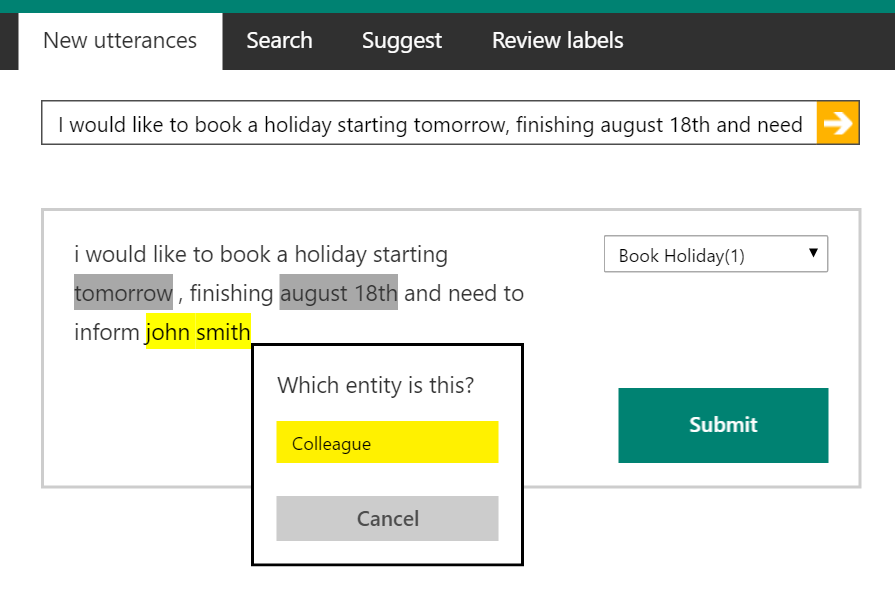
Pre-built Entities are fantastic and really useful, but most of the time you will want to extract one or more custom Entities. For example, users who are booking a holiday in our example might want to inform a colleague within the organisation of their request – something like “I would like to book a holiday starting tomorrow, finishing august 18th and need to inform John Smith”. Here “John Smith” would be a custom entity, called say “Colleague”.
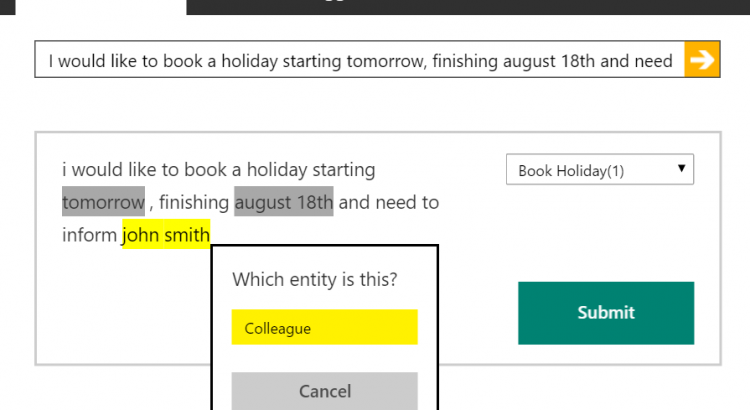
To enable this in our scenario create a new item under the Entities section on the left of the dashboard and give it the name “Colleague”. Now, add a new Utterance, “I would like to book a holiday starting tomorrow, finishing august 18th and need to inform John Smith”, underneath the Utterances tab. However, this time before submitting it and linking it to our Intent, click on the words “John Smith” and you should get a list of Entities pop up (you should only have one, “Colleague”). Just click the name of the Entity that you want to mark these words as and they should become highlighted in the same colour as the Entity has been given in the list on the left hand side. Below shows what it looks like on my model.
Add additional Utterances
Now that we have created our Intent, added a pre-built Entity and then a custom Entity, you will need to add some additional Utterances – just different ways a user might reach the same end goal. When you add each one, make sure you tag any ‘Colleague’ Entities in the way we did earlier. At this stage you could also try adding some additional Intents, along with associated Utterances, such as ‘Cancel holiday’.
Here are a few Utterances I have added in this example to get you started;
- “I would like to book some annual leave”
- “I need to take a holiday starting August 5th”
- “I would like to book some annual leave and need to inform Jon Doe”
Training your model
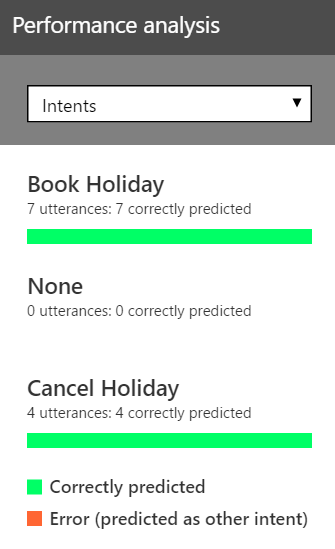
Whilst you are adding Utterances to your model you should notice that, as each one is added, your model is re-training itself with the new information that you are providing it. After each training run, on the right hand side the performance analysis of the model and its prediction performance for each intent should all be green, indicating that given the Utterances you have provided, it is correctly predicting / matching them to the right Intent. This performance analysis, and the pane shown below, will become more useful when you improve your model after you start having real user data being submitted to it, but I will cover this in another post.
Testing and publishing your LUIS model
After your model has successfully ran through a training cycle (which you can see in the bottom left of the dashboard, “Last train completed…”), you can now test and publish your model ready for use in your applications.
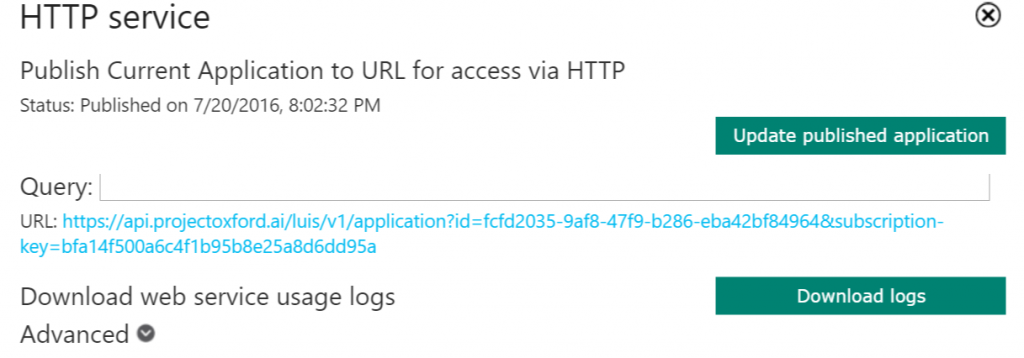
Click the Publish button in the top right of the dashboard and then click Publish Web Service. Once published, you will then be provided with the endpoint URL for your service, which you will need later when you call it from an application.
You also now have the option to call your model, as if it is being called from an application, and check what the output it and if the right Intents are being identified.
Go ahead and try entering something like “I would like to book a holiday starting tomorrow. Please inform Alice White.” into the query box. Once submitted you will then see the response from the service in a new tab and for this example the output looks like what you can see below. As you can see the response includes the initial input passed to the service and then a list of all of your Intents, with a score / probability that the phrases matches for each one. In our case the service has given the ‘Book Holiday’ Intent a score of 1.0, which indicate that it is basically certain that this is a match. You can also see that the response also include Entities that have been extracted from the input and identified for us – in our case an Entity, “Alice White” of type ‘Colleague’ and “tomorrow”, of type ‘builtin.datetime.date’. Even better, the date Entity also includes a resolution value which maps to tomorrow’s actual date. Pretty cool stuff!
{

"query": "I would like to book a holiday starting tomorrow. Please inform Alice White.",

"intents": [

{

"intent": "Book Holiday",

"score": 1.0

},

{

"intent": "None",

"score": 0.0214598961

},

{

"intent": "Cancel Holiday",

"score": 1.87268734E-09

}

],

"entities": [

{

"entity": "alice white",

"type": "Colleague",

"startIndex": 64,

"endIndex": 74,

"score": 0.8917391

},

{

"entity": "tomorrow",

"type": "builtin.datetime.date",

"startIndex": 40,

"endIndex": 47,

"resolution": {

"date": "2016-07-21"

}

}

]

}
Summary
If you have followed this post through, well done for sticking with it, you have now successfully created, trained, published and tested your first LUIS model. Hopefully you should now have a grasp of the basics needed to create more complex models with more Intents and Entities.
In future posts I will discuss how we can improve our models over time and I will also be showing how you can use a LUIS model as part of a bot built using the Bot Framework, to allow users interacting with the bot to do so using natural language.
Let me know how you get on and as always comments are always welcome!