In my last post, I provided a high level introduction to the Microsoft Bot Framework and the main constituent parts that make up the framework. If you don’t yet know what the Bot Framework is, or you need a quick refresher, then you should check out that post.
Today though, I am going to show you how you can create your first bot using .NET / C#. By the end of this post you will have a simple bot running and will be able to test it locally using the Bot Framework Channel Emulator, an excellent tool provided for testing your bots.
First, get the pre-requisites installed
Before we get started building a bot, there are a few things you need to ensure are installed and configured.
- Visual Studio 2015 Update 3 – if you don’t have Visual Studio then why not try the Community Edition which you can find over at www.visualstudio.com.
- Make sure that all of Visual Studio’s Extensions are up to date (Tools -> Extensions and Updates -> Updates).
- Bot Application template for Visual Studio – happily Microsoft have provided a template for Visual Studio to allow you to get up and running with bot development as quick as possible. Download the template from here and then place the zip file (Bot Application.zip) into the Visual Studio template folder (usually located in “%USERPROFILE%\Documents\Visual Studio 2015\Templates\ProjectTemplates\Visual C#\”).
Create your bot application
Once you have all of your pre-requisites installed, it is now time to create our bot. I can sense your excitement from here!
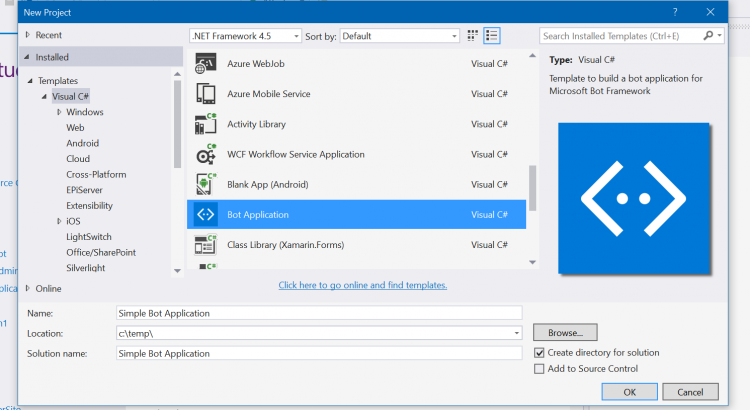
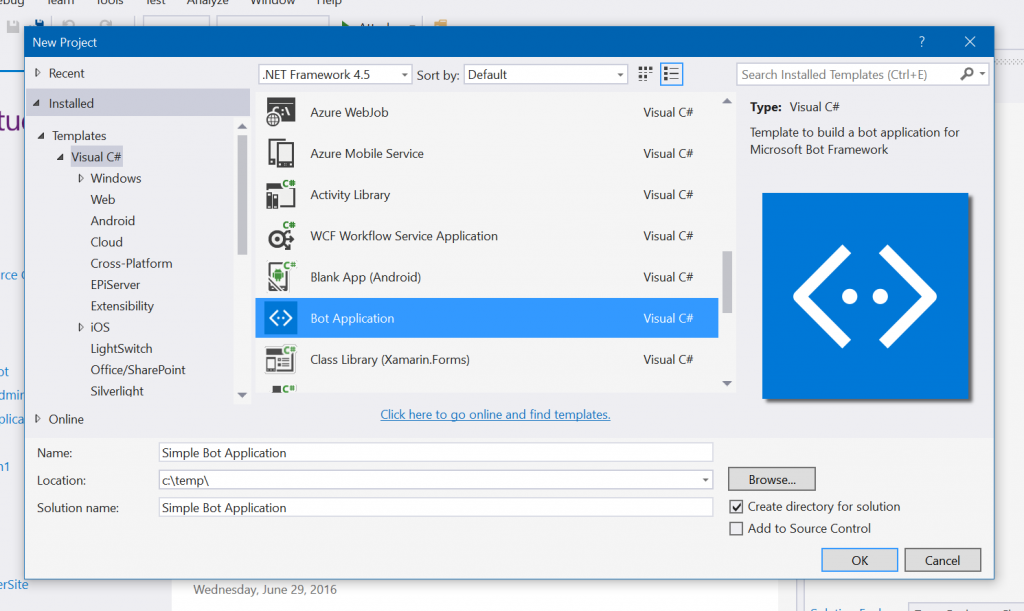
Start by opening Visual Studio and creating a new project using the Bot Application template (if you can’t see it then make sure you have restarted Visual Studio since you dropped the template zip file into the templates folder).
Once your project has been created, just take a moment to view what is included out of the box. Essentially, your bot application is just an ASP.NET Web API with a ‘Messages’ endpoint defined within the MessagesController.cs (if you are not too familiar with Web Api, don’t worry about it too much, just know that the important stuff here is in the MessagesController class).
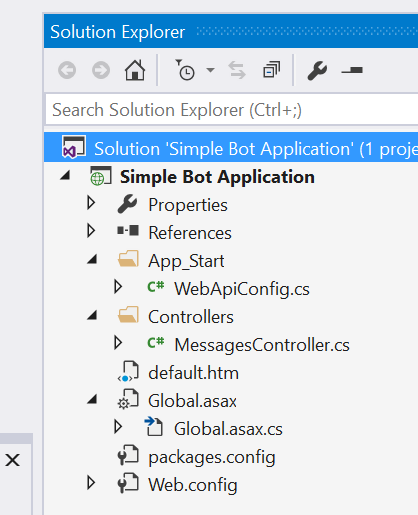
Along with the Web API config and controller classes, the other important file to take note of, as you might expect, is the web.config. In the web.config there are some important app settings that you will need to set before you publish your bot, after you have registered it in the Bot Framework Portal and I will be going through how to register your bot and update these keys in the next post in this series. For this post though, we can leave these values blank and still test our bot locally when we are ready.
Exploring your bot application
If you wanted to, you could run your new bot application right now – it is fully functional. The project created using the template gives you a simple ‘Echo bot’, which will repeat whatever you say to it, along with the total number of characters in your message. Before we do that though, lets take a look in more detail at the MessagesController class and see how this simple bot works.
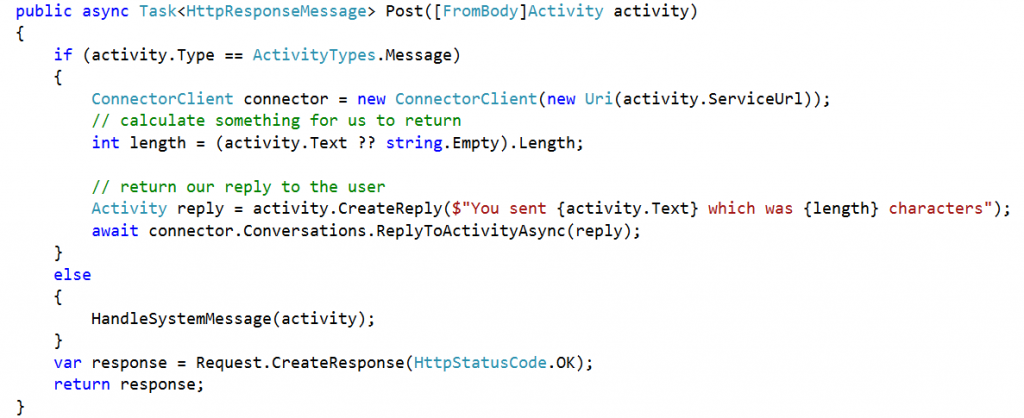
Most of the action in our application takes place in the Post method in the MessagesController class and it is this method that handles receiving the message from the end user and the action of replying to it.
Upon receiving a message, which comes in the form of an Activity object, it checks to see what type of message it is by checking the ActivityType. There are various activity types built into the bot framework, including;
- Message – a communication between the bot and a user. This type of activity is the core activity that represents everything from simple text messages through to more complex responses containing things like Facebook & Slack buttons.
- ConversationUpdate – This activity can let your bot know that it was added to a conversation.
- ContactRelationUpdate – The bot has been added or deleted from an end users contact list.
- Typing – This activity type can be used to indicate that the end user or the bot is typing – for example you could use this to indicate progress to a user whilst your bot is busy carrying out an action or calling another service.
In the Post method of our MessagesController, a check is done to see if the Activity is of type Message (the core activity type mentioned above), or if it is more of a System Message activity (such as Typing). If it is a Message activity then the first thing that is done is to create a ConnectorClient object which accepts the ServiceURL value from the incoming Activity, which is the endpoint that should be used by the bot when sending replies.

Then, once we have decided what the reply message should be – in this case just repeating the user’s message back to them along with its length – we just need to create a reply Activity, which we can do by using the CreateReply method on the incoming activity and passing in our desired message. This gives us a new Activity ready for us to send back in response to the user. To send this reply we can use the ConnectorClient we that was created earlier, passing the the reply Activity object to the ReplyToActivityAsync method.

That really is about all there is to it for receiving a simple message and replying to it. Pretty simple eh?
Testing the bot
Even though we haven’t yet published our bot, or even registered it in the Bot Framework Portal, we can still test it using a the Bot Framework Channel Emulator. You can download and install the emulator from here. Once you have your emulator installed you can go ahead and run your bot application project, which when ready for testing should open a new browser window that looks something like below.
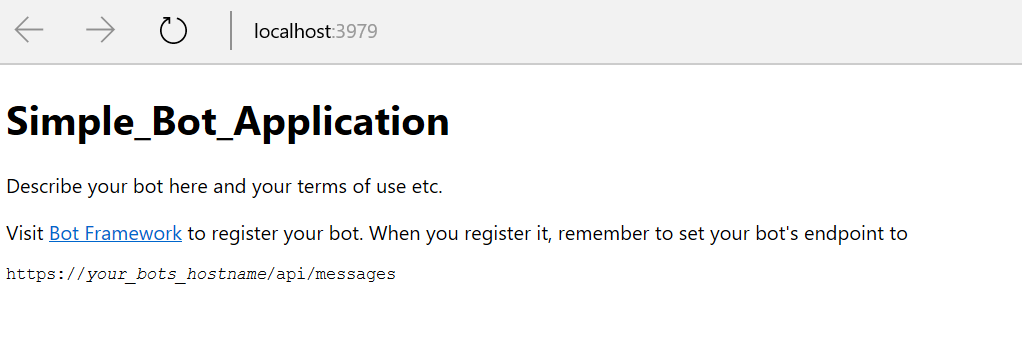
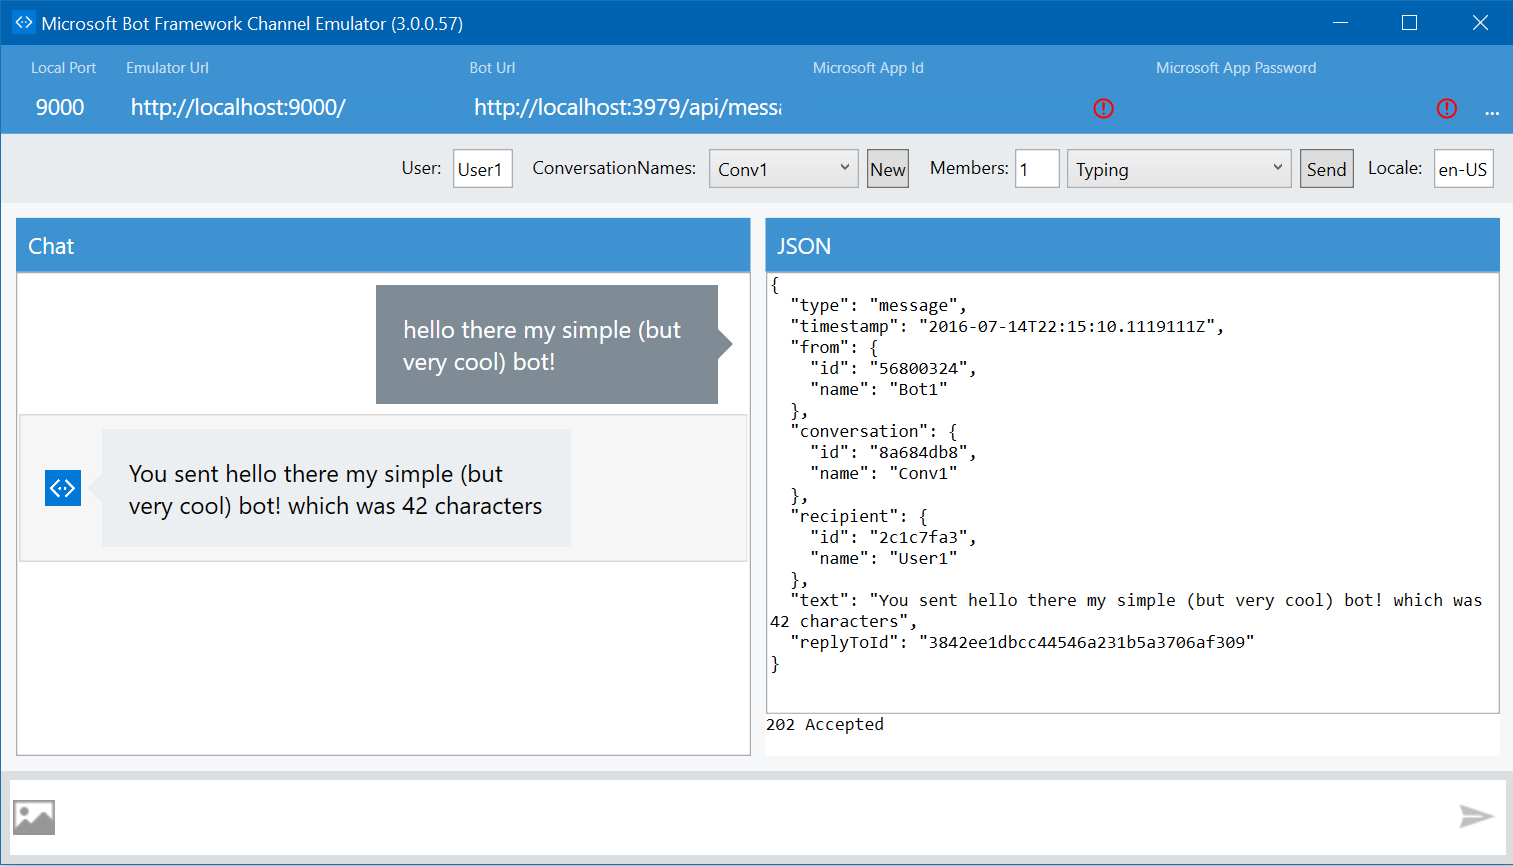
Now, launch the emulator and ensure that the Bot URL property’s root domain and port matches with the URL where your bot application was deployed from Visual Studio (see the address bar in the image above). You can leave the App Id and Password properties blank, we will only need to populate these once we publish and register our bot (in the next post).
You should be able to try sending your bot a message and if all goes well you should get a reply! Even better you can click on each individual message to see the JSON behind each one, which is great for debugging purposes!
Summary / What’s next?
In this post you have seen how to install the required pre-requisite software, create a simple bot using the Bot Application template, explored the project created and tested your new bot locally.
In part 2, I will walk through how to register a bot in the Bot Framework Portal, publish it to the web in Azure and how to communicate with your newly published bot through Skype!
Let me know if you try the above out, I would love to hear how you get on.