In the previous post of this 2 part tutorial, I demonstrated how you could build a bot using the Bot Framework and the included Bot Application template. I also went through testing the bot locally using the Bot Framework Channel Emulator. So, if you haven’t already got a bot working locally ready to publish then check out Creating your first bot with the Microsoft Bot Framework – Part 2 – build and test locally.
In this post I am going to show you how you can register your bot in the Bot Framework Portal, publish it to Azure and then talk with it through Skype. Very cool stuff.
Registering your bot
The first thing we need to do, not that we have a bot ready to publish, is to register it in the Bot Framework Portal (I talked about what the portal was in my Introduction to the Bot Framework). Head on over to http://dev.botframework.com, click “Register a bot” in the main menu and sign in with your Microsoft account.
Now we need to fill out some key information about our bot and also configure some of the underlying authentication information that we will need to update our bot application config before we publish it.
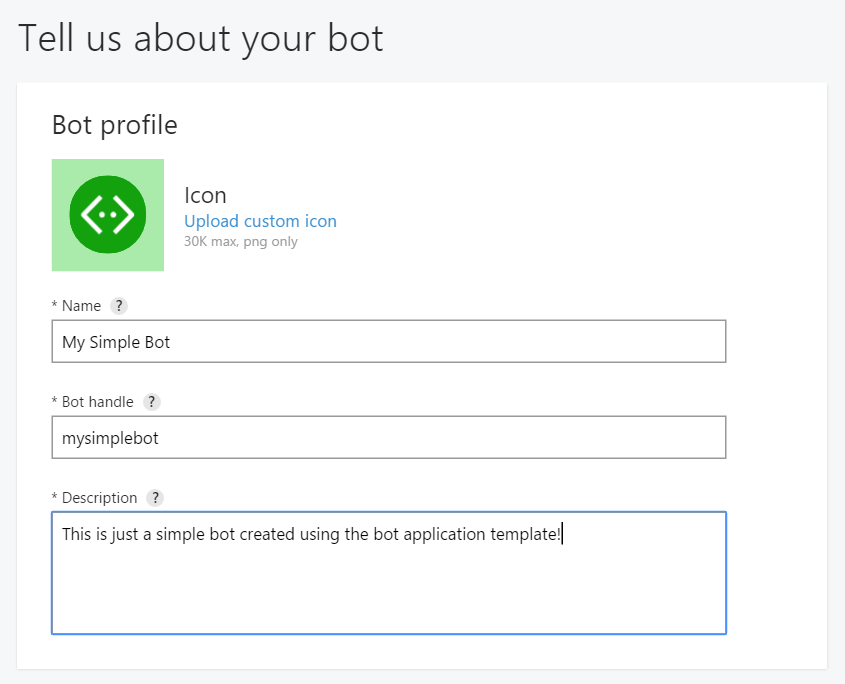
First, you need to provide a name, handle and a description for your bot. You can also choose to upload a custom icon here as well.
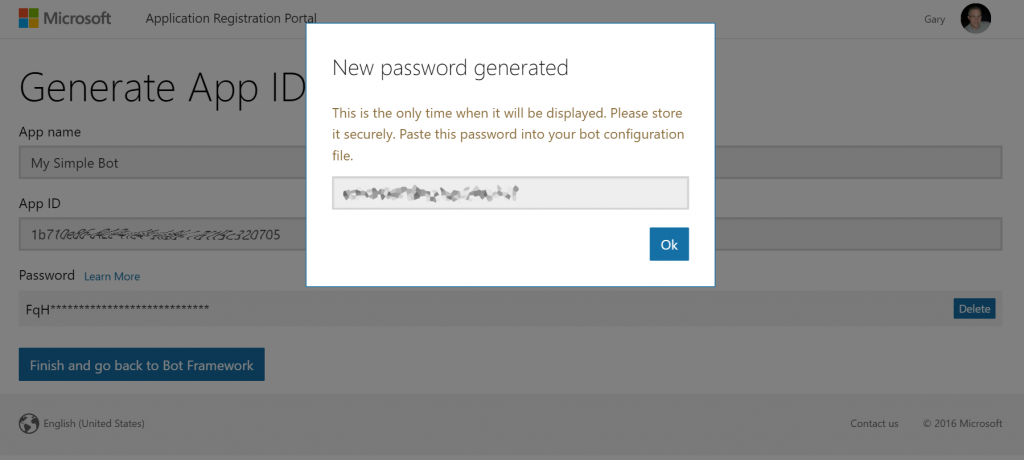
Next it is time to configure our bots authentication info. Scroll down to the Configuration section of the form and click ‘Create Microsoft App Id and Password’. This will open a new tab and take you to the Microsoft application portal, where you should be presented with a form already populated with an app name (the name of your bot) and a newly generated App Id – make a note of this Id as you will need it soon. Click ‘Generate a password to continue’ and you will be presented with a popup and your new password, as shown below. As it says, this is the only time that your new password will be shown so make a note of it now before closing the popup.
Once you have your App Id and Password, click the button to finish and go back to the bot framework page and you should find that your new App Id is populated in the registration form for you.
For now you can leave the Messaging Endpoint field blank. You will also need to put some values in the Publisher Profile section, such as Privacy Statement and Terms of Use urls – you can just put placeholder values in for now to get registered. Once you are all done just click Register at the bottom of the page to complete this part of the process.
If everything has gone well, then you should now see you bots dashboard where you can see a list of channels your bot has been configured for (as well as those available to configure) and other details about your bot, such as its name and endpoint. However, you cannot test your bot with Skype yet as the page says, “You cannot test or publish your bot until you specify an endpoint.” and to get this we need to publish your bot to the web.
Updating your bots config and publishing to Azure
Now that you have registered your bot, go back to the bot application in Visual Studio. Open the web.config and update the BotId setting with your bot handle (if you don’t remember it you can find it on the bot dashboard page) and the MicrosoftAppId / MicrosoftAppPassword settings with the values you made a note of earlier.

Now we are ready to push our bot into Azure.
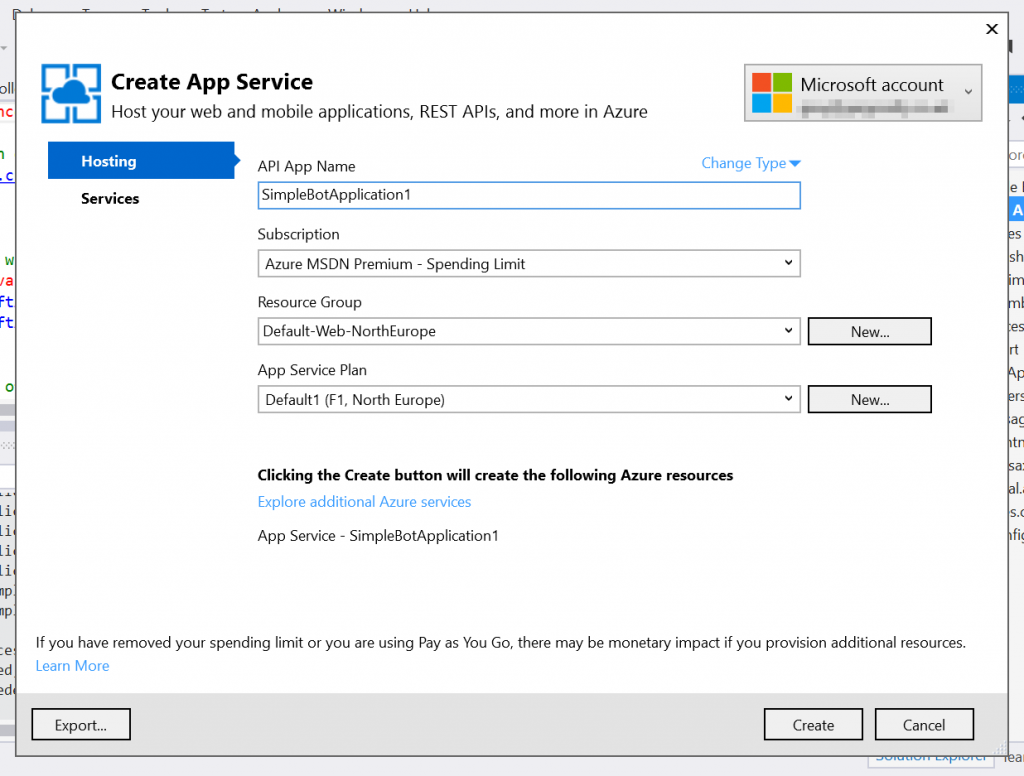
Right click on your bot application project and click Publish and start by choosing ‘Microsoft Azure App Service’. Then, from the drop down list, choose the Azure subscription where you would like to create the new app service and click the ‘New…’ button. Now you will be presented with the dialog shown below. Fill in a name for your app service and when you are happy click the ‘Create’ button.
Your new app service will be created in Azure for you and the next dialog you see will be the Visual Studio publishing dialog with your app service’s publishing profile already imported. From here you can just click ‘Publish’ and your bot will be pushed up to Azure.

Once your bot has been published to your app service you will see the default page of your bot opened in your default browser. Make a note of the hostname, in my case it would be https://simplebotapplication.azurewebsites.net, as you will need it in a moment to update your bots configuration in the portal.
Update your messaging endpoint and test your bot in Skype
Almost time for the best bit, conversing with your bot in Skype, but, before that we need to add an endpoint to our bot configuration in the Bot Framework Portal. So, navigate back to the portal and to your bot’s dashboard. Click the ‘Edit’ link to manage your bots details and fill in the messaging endpoint property. It will be your hostname followed by ‘/api/messages’, so for me it was https://simplebotapplication.azurewebsites.net/api/messages, and save your changes.
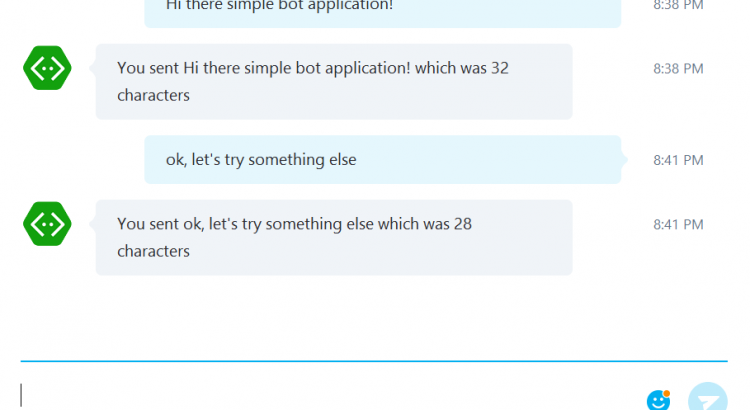
Ok, now we can test! Make sure you have Skype installed and then back on the dashboard you can click the “Add to Skype” button (remember, the Skype and Web Chat channels have been configured for you by default). This will open your browser, allow you to sign into Skype and confirm that you want to add your bot to your contacts.
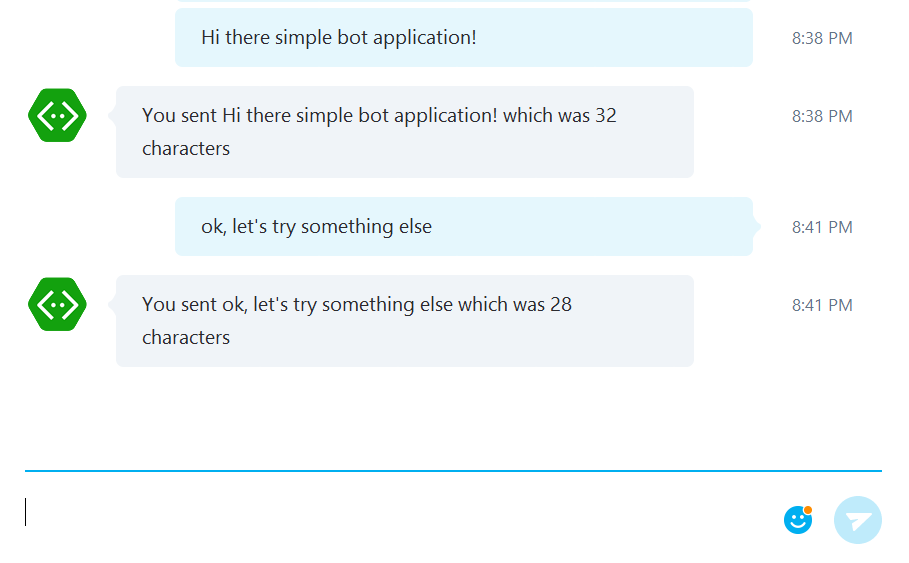
Now you should have your bot available in Skype….so start talking and if all goes well you will get a response!
Summary
During the course of this post you have seen how to register your bot in the Bot Framework Portal, publish your bot to an Azure App Service, complete the configuration of your bot and finally you were able to talk to your bot through Skype. How cool is that?
In coming posts I will show you how you can add intelligence to your bots using Microsoft Cognitive Services and also review the other channels that are available to you and how you can take advantage of some of their special features, like Skype calling!
What do you think of the Bot Framework so far? Feedback and comments always welcome.
Brilliant post! Thank you for sharing!
Well done. This was a great example AND it worked.
Can you write a post about how a bot can handle Skype calls ? Thanks in advance.
Sure, great idea. I will add it to my list 🙂